 |
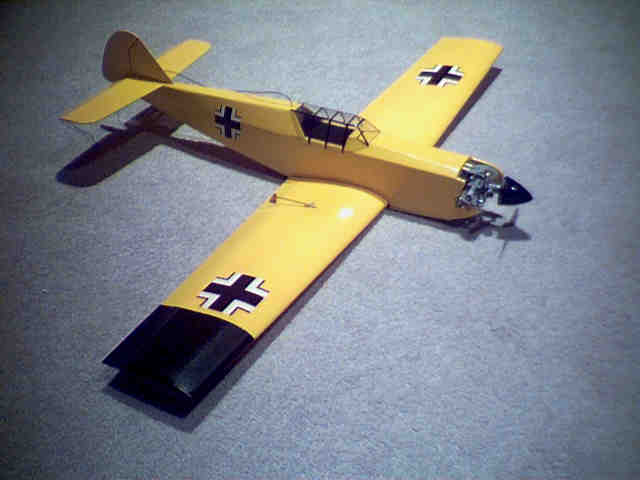
I built the ME 109 from the Ace simple series when my club SCCMAS organised a race. It seemed like a fun, low
cost and effort way, to get into racing ... just for
grins. Norvel had a few planes left in stock, but the
manufacturing for Ace is moving to Hong Kong, and the
supply has dried up, so they are getting scarce. You see the result on the right. I've put some construction tips here, some of which I gleaned from other web sites. Long live the Internet ! Why shouldn't we all benefit from each other's tips ? |
||||||||||||||||
Construction TipsWhilst looking for a kit on the
Internet, I stumbled across a simple racer site, which is
worth looking at. It's Bob's Simple Series Racing. Some good tips on propeller selections there.
You can also look at "vacuum bagging" techniques for the wings. I had no idea what it
was. It’s a great way to finish wings if you want to
invest in a vacuum pump, by using atmospheric pressure to
hold a plastic film over the glass skins to the wings. It
leaves them smooth and ready to paint. Just glassing the
wings and leaving a mat appearance seems to work OK, and,
like I mentioned above, the little extra speed you might
get with vacuum bagging will be lost to bigger factors
like engine performance/reliability, and your own ability
to turn the pylons tightly without cutting inside them ! |
|||||||||||||||||
Fuselage ConstructionI put a single sheet of glass over the
front of my firewalls just to give a flat surface whic |
|||||||||||||||||
Wing ConstructionI put a balsa fillet in the middle of the two halves of the wing, which is easier to sand to the right cross-section for the dihedral than sanding the two foam wing roots. It also provides a better anchor for the wing dowel (which I subsequently broke on a hard landing, and replaced with a wood screw (barrel head, hex key type). I put a balsa plate over the end of each wing time before glassing them with one sheet of 3oz glass. I glued a second plate over that one, once the excess glass had been trimmed away, which could then be rounded off a little, making a stiff tip, where I expect the plane will take some bangs ! Aileron configuration
Finishing the PlaneI finished the fuse and tail surfaces
with sanding sealer, and sprayed the whole thing with
fuelproof "Cub yellow". I’ve been using
covering film for years, and figured that spray will save
me the problems of peeling edges and lifting film that
plague these coverings. I dropped the idea of spraying it
in real battle colours when I looked at pictures of the
real thing in a book and found how un-scale these models
really are. Also, my wife pointed out that a camouflaged
aircraft would be difficult to see in the sky. Actually,
given that this baby will belly land on grass
(hopefully), the real problem might be finding it after
doing an off-field landing in long grass. People do paint
them like fighters, though, and they do look pretty good.
The only thing I would change is that I'd recommend
covering the fin. My one cracked along the vertical grain
numerous times over the back end of the stab, and nobody
with a film-covered plan had had the same problem. |
|||||||||||||||||
Choice of EngineI chose the Norvel because it has a muffler, so you can fly the plane for leisure with less annoyance to bystanders. By connecting some tubing to the exhaust, you can make it pretty quiet at the expense of some revs, and think about taking this little baby on vacation with you just for fun. Norvel advised me against the .049 in favour of the .061, which is apparently more powerful, the same weight, and presumably more reliable to start and run. But race rules stipulate .049. The .049 is clearly a reliability problem for many fliers, but it just screams in other planes. |
 |
||||||||||||||||
Engine BehaviourOpinions vary on getting the engines running. My new engine seemed really tight at top-dead-center, which I presume was causing overheating during running in, as the piston/sleeve rub to a good fit. The engine was certainly reticent to keep running, and would not run for a full tank even on what appeared to be a stable needle valve setting. The changeover from a primed engine to one happily running on the needle valve setting was tough. I found dabbing a finger over the air intake to keep fuel flowing while the engine was warming up was a good method to getting the thing to keep running while fiddling with a the needle to figure out where it would run on its own. Once run in, and installed in the plane, the crankcase pressure feed and the right needle setting should just keep the engine screaming until the fuel runs out. Getting the thing running stably is a knack you have to build. The best starting method seems to be to use a starter to turn the motor without priming it. This develops enough pressure to get the pressure feed in the tank going, and once the engine fires, it should keep going. The racing trick is to fill the tank ahead of time, which often spurts fuel back into the crankcase via the pressure feed hose. Turn the prop with the starter (no power to the plug) to get the excess fuel out, then fire up the plug. Start the engine. This will prevent the engine locking, and burn out what excess fuel remains. When the engine is running well, pinch the feed tube to stop the engine. I was always first to be ready to launch using this method. |
|||||||||||||||||
Engine Tuning
At the race day, the majority of people had the Norvel engine, but there was a marked difference in performance. Most ran without the muffler, which is OK at an isolated flying field, but really too noisy for sport use. In order not be last, I checked out a few propellor and fuel combinations, shown here. In General, the higher the revs, the faster the plane is going to go. Make sure the prop is well balanced, too. The spinner put mine off balance again, so I removed it. The guys that won had 5x3 propellors worked over to give then a narrower chord. Getting a good engine runThis is the prerequisite to racing success. It is common for these engines to run for a while, then drop their revs, or alternate low and high revs. There are several possible causes :
If you keep a fuel filter in the line, and wrap the tank in foam, you should get over the dirty fuel problem and, for the most part, the foaming problems. The prop drag is a matter of experiment - launch the plane just a little rich. The temperature thing is unlikely to be the problem, as the engines won't gain a lot of temperature in flight, and certainly not well into the flight. The "sponge oscillation" is a theory of mine. There is evidence to support it, particularly with a full tank. I can only think of using a bladder tank as a final fix to this, so try out the other things first. Alternatively, running without pressure feed should give an indication as to whether this is the cause of mid-flight engine misbehaviour. Mail me if you have a better idea ! |
|||||||||||||||||
FlyingYou have to hold the plane behind the wing, which means it wants to tip forward. Important that your hands and fueslage are not too greasy when doing this. A gentle launch will sent the plan off on it's way. It's pretty fast, so it responds to small movements in the control surfaces. Particularly the aileron. Since it only flies at full speed, that makes the first trimming flight a little hairy. I noticed on race day that a number of planes dropped low enough after launch to hit the ground before acheiving flying speed. I didn't suffer that. My technique is to expect to put on full up elevator after launch, and let it off as the plane gains speed. This seems to work very well. On the first flight, the problem was really wrestling with the aileron trim while the plane was soaring to an alitude so safe that it was hard to figure out what the plane was doing ! You can't throttle back to descend with these things. |
|||||||||||||||||
 h is 100% fuel proof, and won’t go soft or
peel off on me as paint often does after a while. This
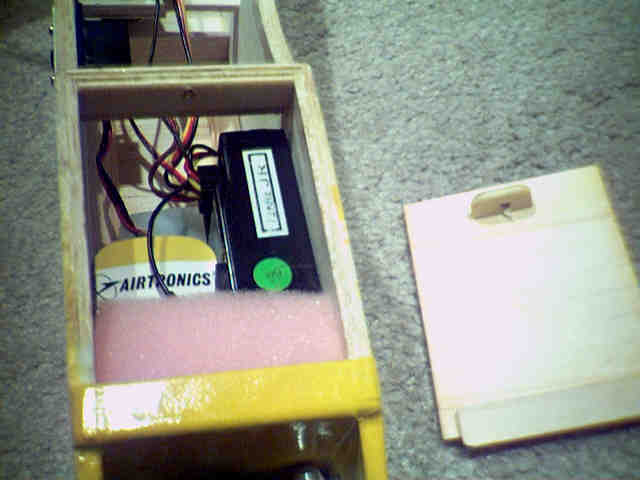
glass is extended to cover the front of the fuse
underside, to take scratches on landing. It's already
prevented a wound with fuel soaked into it, after a rough
landing on a tarmac strip A short section (about 1 cm.)
of the front underside is glued in place. The remainder
of the underside forward of the wing is a hatch cover
held in place by a tab which fits under the lip formed by
the short piece of glued underside at the front, and by
the wing dowel at the back. You can replace it when (not
if!) it gets really scratched up. Actually, the hatch
wasn't as tight as I hoped, so I later screwed the back
of it on with two small wood screws.
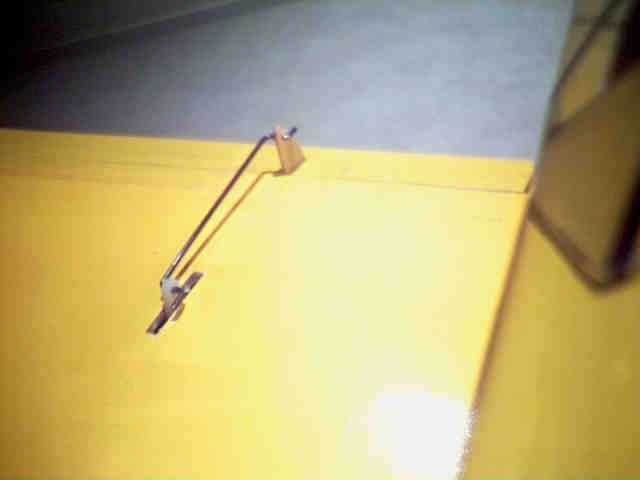
  I put a single servo in the outboard (right)
wing to operate a single aileron. There are two schools
of thought on this. One says that putting it inboard
creates a little drag in the direction of the turn (you
only turn left when racing). My own theory is that it's a
good thing to have it dragging the upper wing during the
turn, as there is no operational rudder, and it seems to
me that this might help it from tending to turn
earthwards during the turn. Putting the weight of the
servo (I used HS80's) in one wing, causing the wing to be
heavier on the right than the left, doesn't seem to be a
problem.